|
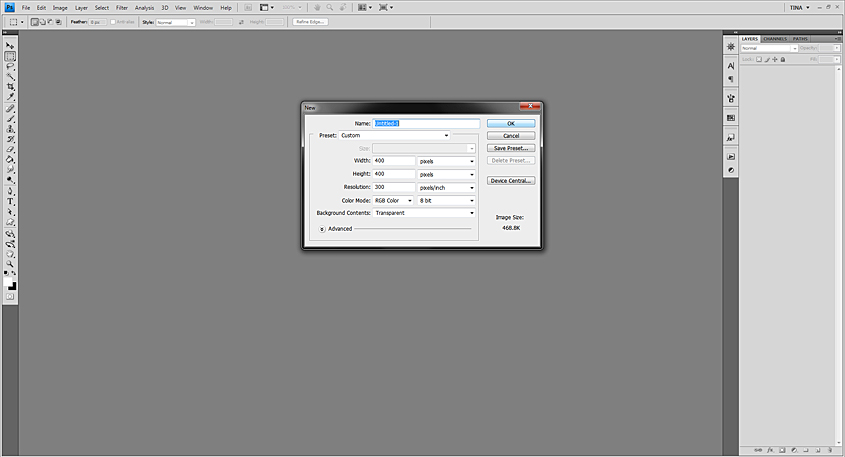
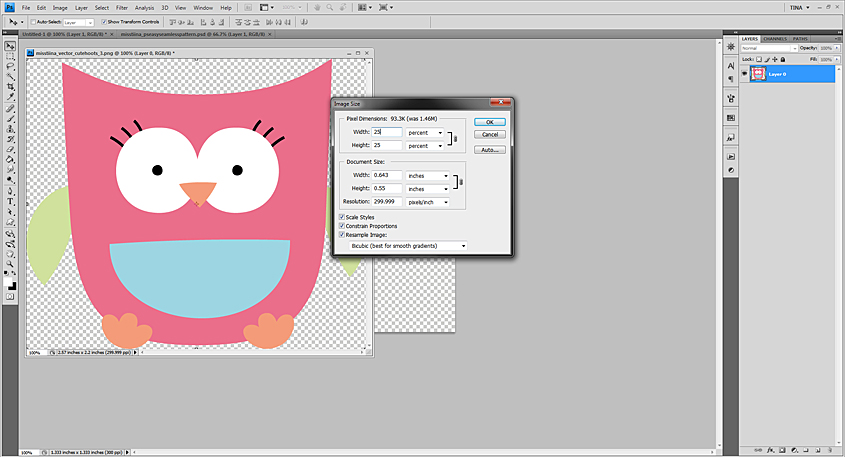
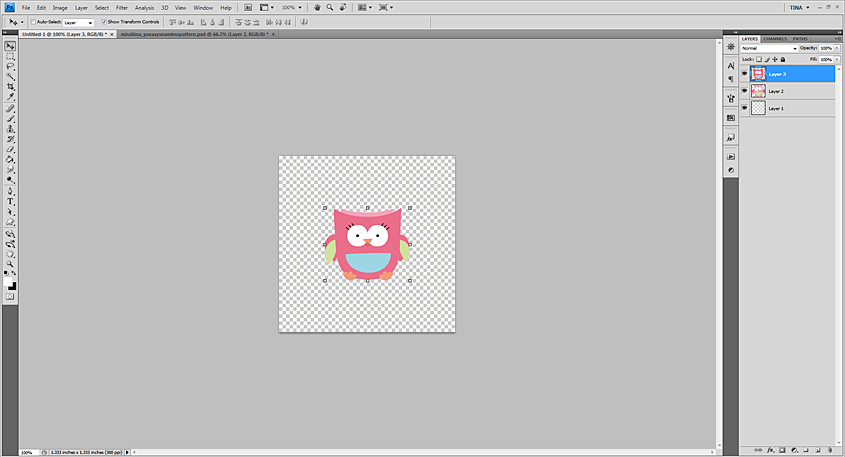
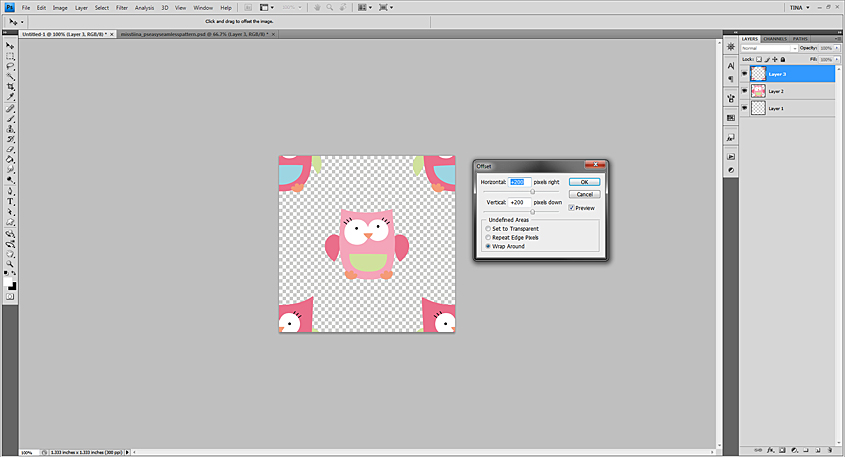
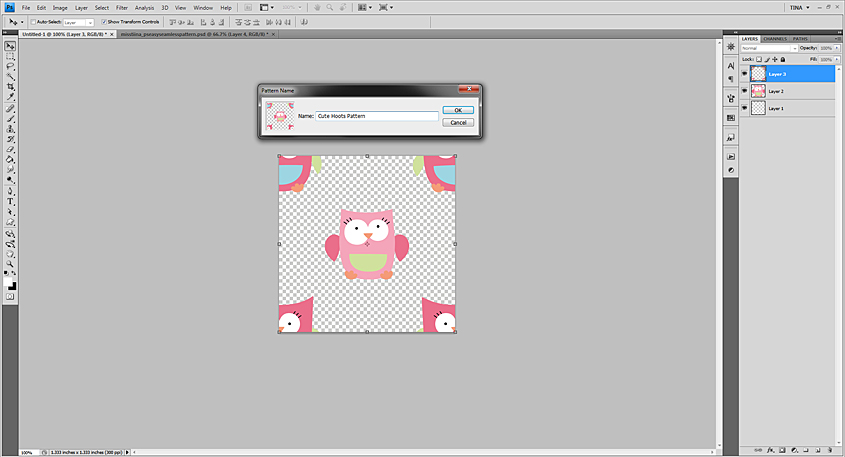
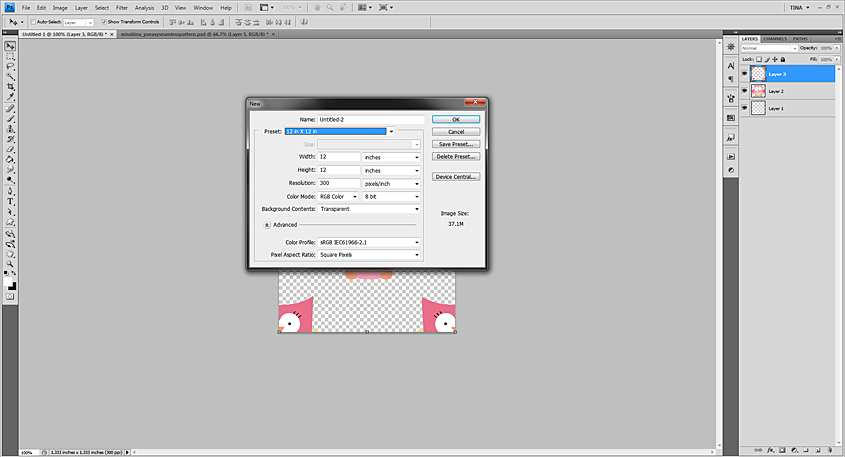
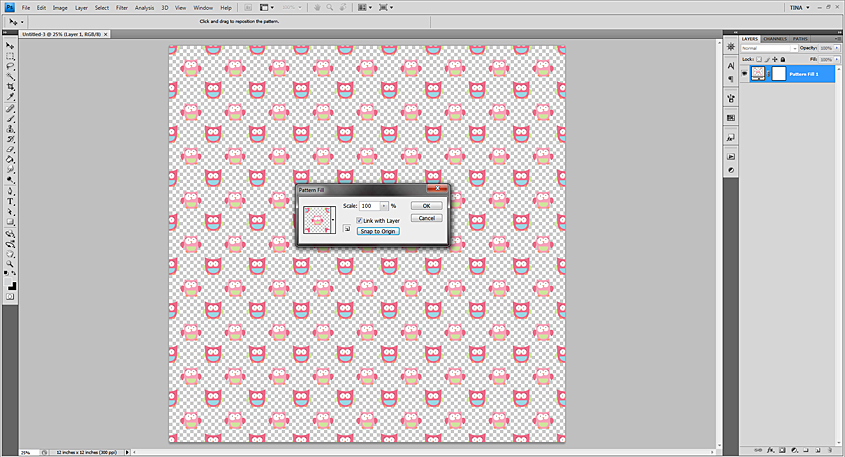
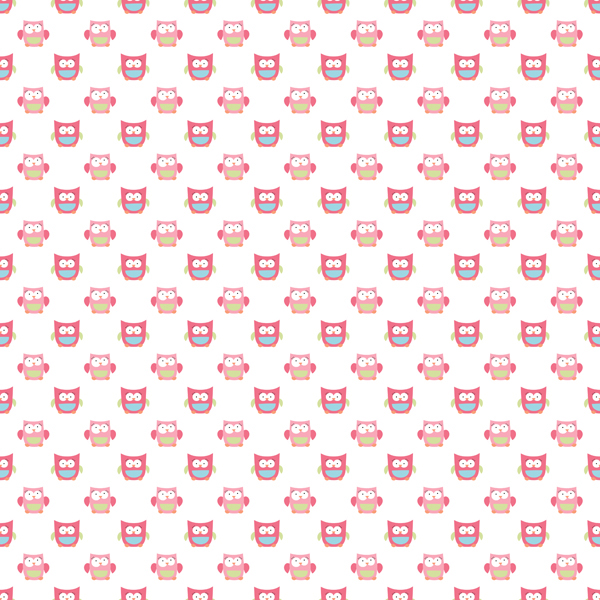
Miss Tiina - Easy Seamless Pattern Tutorial for Adobe Photoshop This tutorial will show you how to easily design a seamless pattern in Adobe Photoshop. To begin let's create a new document. File - New. Create it 400x400 pixels with RGB 8 bit color mode and 300ppi with a Transparent background. (click any image in this tutorial to view larger) ----------------------------------------------------------------------------------------------------------------You'll need some art to pattern - I have picked two different.png owls from my Cute Hoots {CU} vector set. I have scaled them both down by 25% - go to Image - Image Size. Select percent from the top drop down box and type the amount in the box to the left of that, click ok. The size you select will vary depending on the images you use. What you want to try to do is size the images about 20-25% of the size of the 400x400px document so they will not overlap and have a nice distance between eachother once we make it seamless. ----------------------------------------------------------------------------------------------------------------Now you'll need to get them on to your 400x400 pixel document. Click the image and while holding your pen or mouse on it, click and hold Shift on your keyboard then drag and drop. Holding Shift will center them in the document. Do this for both images. You should now have something similar as below. ----------------------------------------------------------------------------------------------------------------Now to make it seamless. With your top layer highlighted in the layer panel as shown below... Go to Filter - Other - Offset... A menu box will pop up. Enter +200 in both boxes and select Wrap Around. Click OK. ----------------------------------------------------------------------------------------------------------------Now that your pattern is seamless and should look something like below... go to Edit - Define Pattern... Give your pattern a name and click OK. Viola! You now have a new pattern in your pattern presets!! See more below for how to make a background paper with it! ----------------------------------------------------------------------------------------------------------------Now we are ready to use our new pattern! To use this pattern as a digital scrapbook background paper create a new document. File - New. 12x12 inches with RGB 8 bit color mode and 300ppi with a Transparent background. ----------------------------------------------------------------------------------------------------------------Now to fill the document with our pattern. Go to Layer - New Fill Layer - Pattern... A box will pop up, make sure 'Color' is set to None, 'Mode' is set to Normal and 'Opacity' is set to 100% - click OK. Another box will pop up (as shown below) Set the scale too 100%, Link with Layer is optional and click 'Snap to Origin', then click OK. ----------------------------------------------------------------------------------------------------------------And there we have it, a nice and easy seamless pattern! Want to see how I've done it closer? Click the image below to download mine :) (.png and .psd included - cu ok!) |
